
Connect Your Store to CODSwiftly
Once connected, every order goes straight to CODSwiftly: our call center confirms it, our team delivers it and collects the cash.
Add your product in CODSwiftly
Open Stock → Add Product. Our team checks and approves the product. You can also pick a ready product in the Marketplace, already in our warehouse.
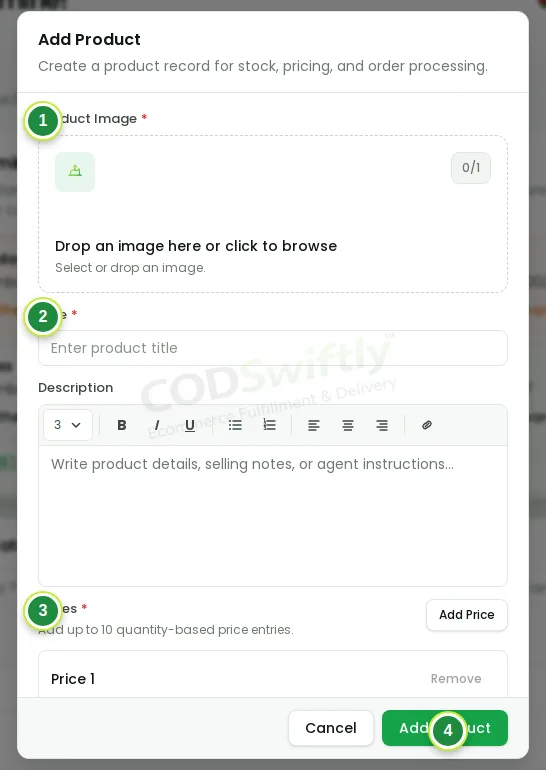
- 1Product image.
- 2Title: the same name as in your store.
- 3Prices: the selling price, and the prices for 2 or 3 pieces if you have an offer.
- 4Add Product: it is sent for approval.
Wait for the approval
A new product shows Pending: our team checks it (product, price, country). When it is approved it becomes Active and gets its SKU. You can connect your store while you wait: orders received before the approval are kept and processed as soon as the product is approved.
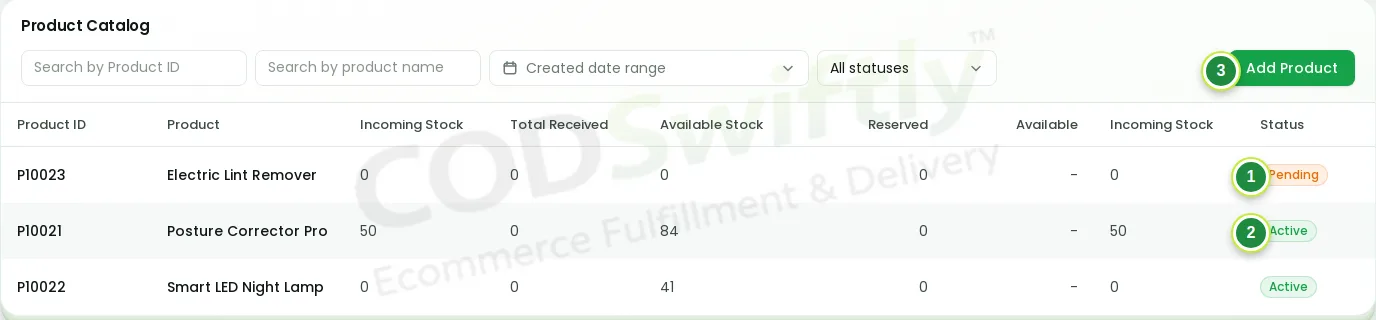
- 1Pending: waiting for the approval of CODSwiftly.
- 2Active: approved, orders and stock work.
- 3Add Product: add another product.
Choose how your orders arrive
Open Integrations. Use one method per store: two methods on the same store would bring every order twice.
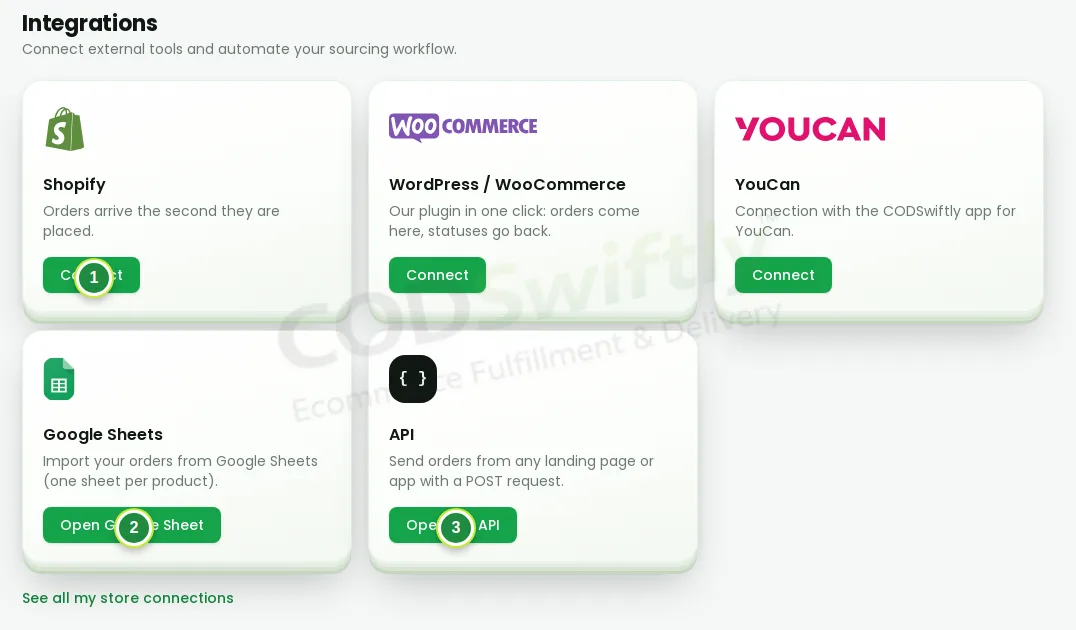
- 1Shopify: the orders arrive the second they are placed.
- 2Google Sheets: the orders are imported from a sheet every minute.
- 3API: for any other landing page or app.
Method A: Shopify webhook
Click Connect on Shopify, then + New connection. Give it a name and choose the country: the orders of this store go to that country. Copy the link shown.
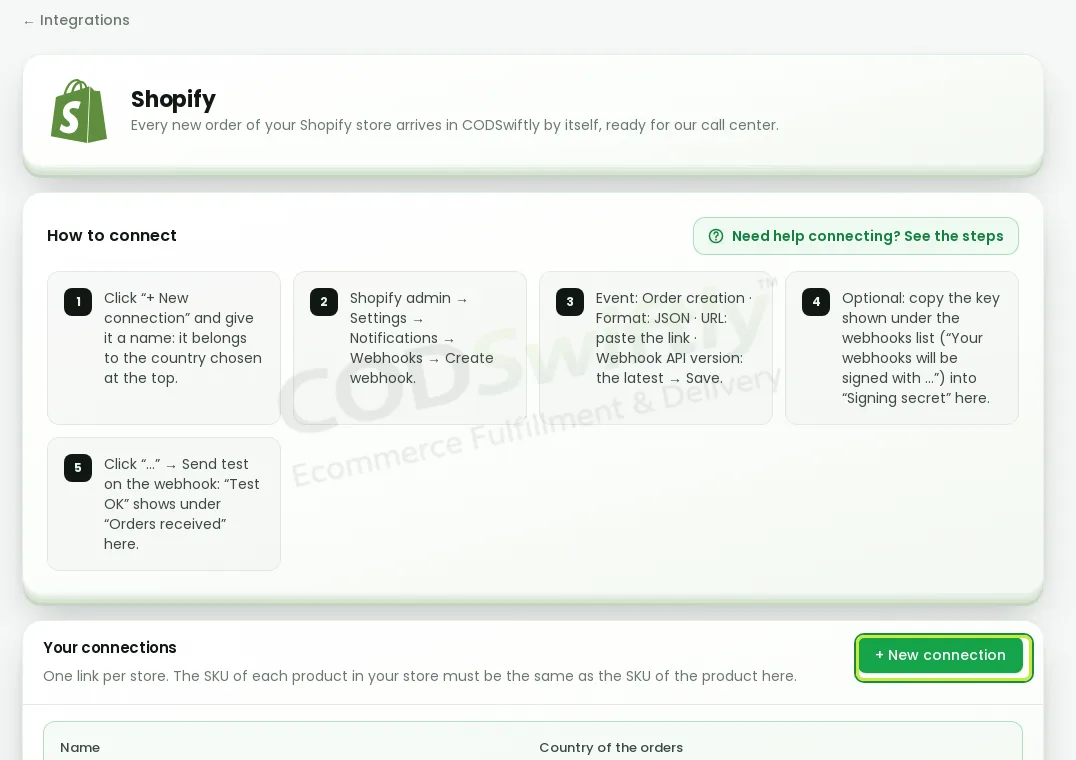
- The green frame: + New connection.
In Shopify, open Settings → Notifications → Webhooks → Create webhook:
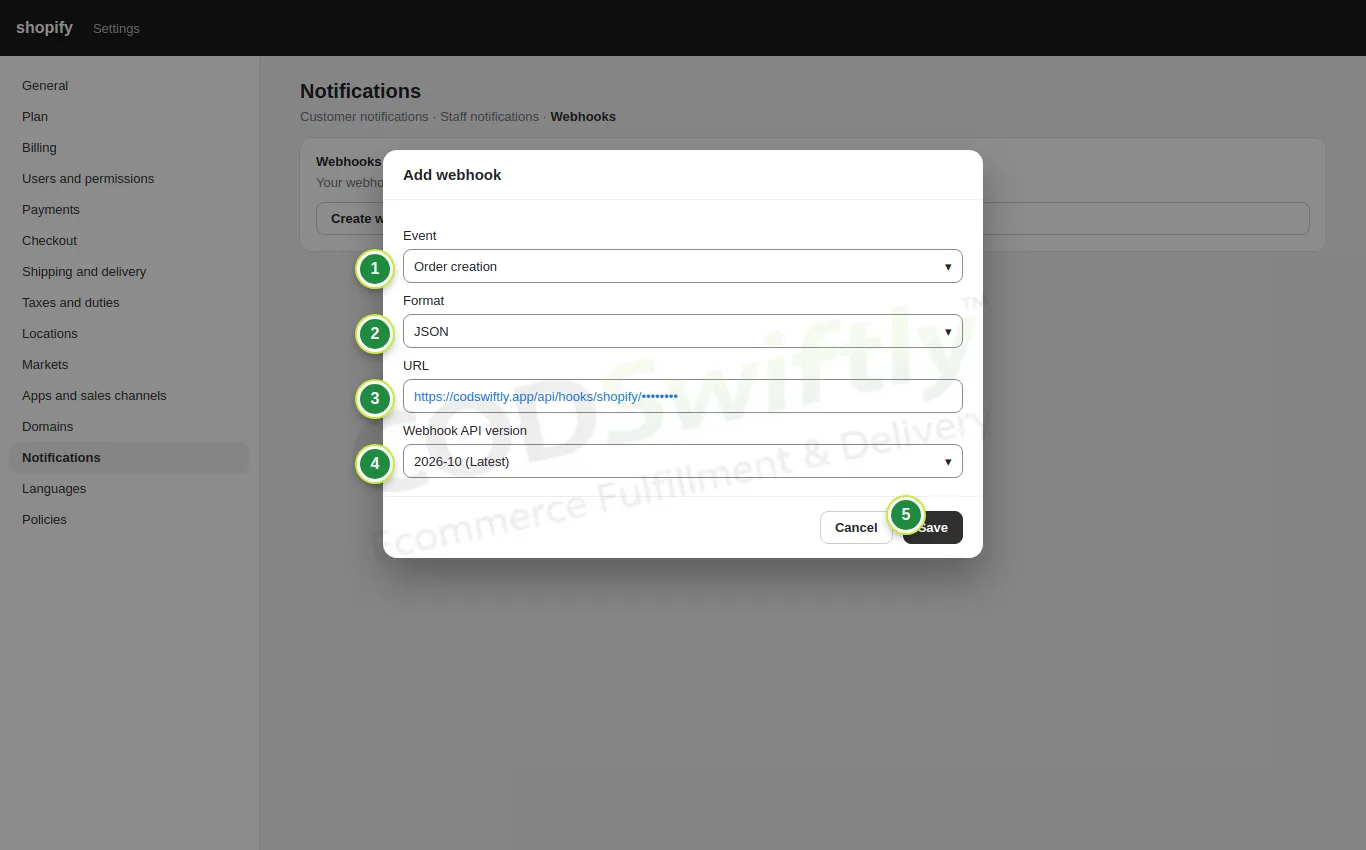
- 1Event: Order creation.
- 2Format: JSON.
- 3URL: paste the link copied from CODSwiftly.
- 4Webhook API version: the latest.
- 5Save. Then click “Send test”: “Test OK” appears in CODSwiftly.
The SKU of each product in Shopify must be the same as the SKU of the product in CODSwiftly. If you use EasySell, make sure it creates a Shopify order for each form (this is its normal setting), so the webhook receives it.
Method B: EasySell and Google Sheets
No webhook? Send the orders of EasySell to a Google Sheet, then link that sheet to CODSwiftly. In EasySell, open Google Sheets:
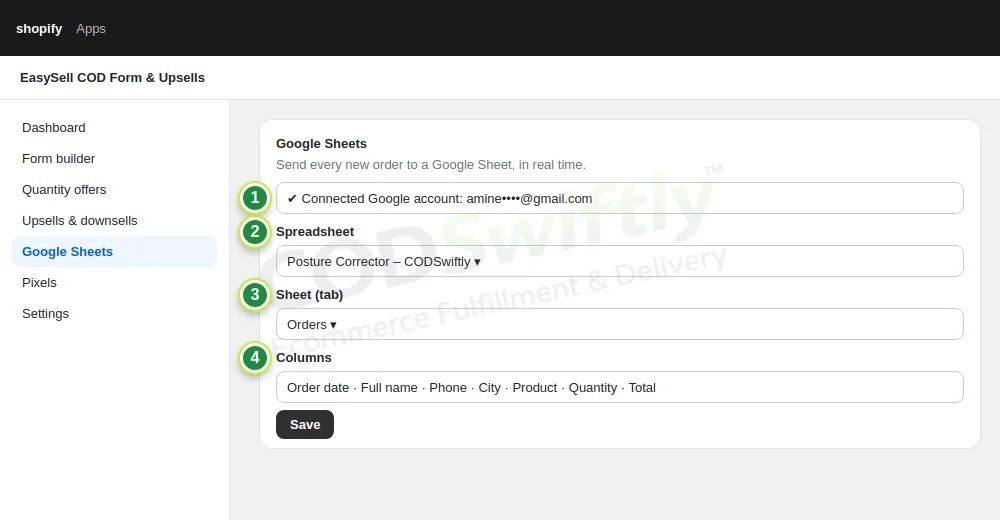
- 1Connect your Google account.
- 2Spreadsheet: one spreadsheet for this product.
- 3Sheet (tab): the tab where orders are written.
- 4Columns: date, name, phone, city, product, quantity, total.
In CODSwiftly, open Integrations → Google Sheets and click Setup Guide: share your spreadsheet as Editor with the email shown. Then Add Sheet: choose the product, paste the spreadsheet ID (the long code in the sheet link) and the tab name. New rows are imported every minute.
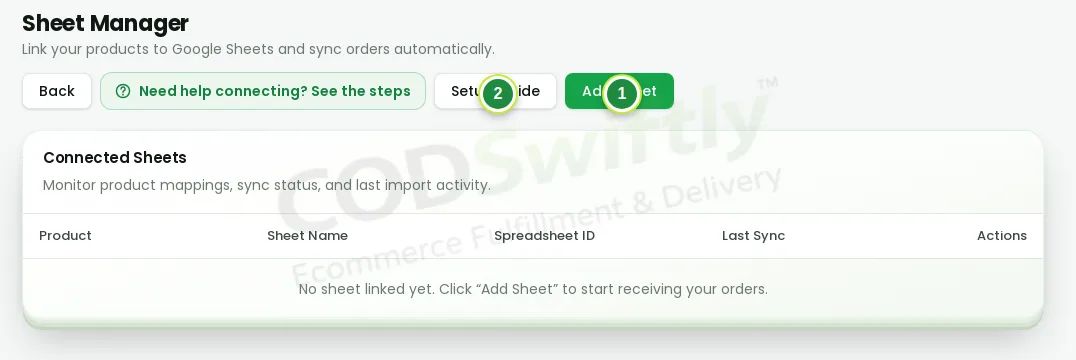
- 1Add Sheet: link one sheet to one product.
- 2Setup Guide: the email to share with, and every step.
The numbers in the pictures are examples that show how the screens work. They are not a promise of results.
Follow the course with a real account
Create your free CODSwiftly account: storage, call center confirmation, delivery and payouts in Kenya, Tanzania, Ghana and Zambia.